As you might have noticed in most of my house photos, I am not a very big fan of curtains on windows. I am more of a plantation shutter kind of girl. Or, if possible, I much prefer to leave the window bare naked and let the sun shine in! A quick flip through any dwelling magazine these days tells me that I am not alone in this trend. Bare windows are rampant!
But there are certain rooms where curtains are a requirement.
Like bedrooms.
And bathrooms.
I have two bathrooms upstairs that I have never shown on my blog, mainly because they are still covered in the original 1990’s wallpaper (with borders!). Finally, we are making plans to give those bathrooms a facelift and bring them into the 2013 standards. I hope you’ll follow along with us on the progress!
Brace yourselves, because I’m about to show you a never before seen parts of my home. The first bathroom is a tiny guest bath that is off of my office/ craft room. The room is so small I am barely able to get a picture of it with my widest angle lens. Check out this pink and yellow flowerdy goodness:
When we first bought the house there was a set of pink plastic mini-blinds on the small window that were so ugly I just took them down and tossed them in the trash. I never got around to putting up any kind of curtains in this bathroom until now. My overnight guests who have to shower in this previously curtainless room will thank me! Here is the curtain solution I created to be a starting point for the entire bathroom makeover:


I found this cheap white roll-up shade that fits the 24” width perfectly, but the plain white shade needed a little something extra. I whipped out my paints, stencils and Frogtape and set to work creating a one of a kind monogrammed curtain for my girly bathroom.

For the sake of brevity, I am planning to give you a full step-by-step tutorial on how I created this easy custom window shade in separate blog post. Keep your eye out for it soon! I will say it was super easy to make and I love the way it turned out.

Remember how I told you guys that I have been asked to be a part of the True Value Blog Squad this year? One of the first tools that I knew I wanted to buy as a blog squadder was a lightweight, battery operated screwdriver for overhead jobs. I wanted one that was not going to make my arm ache if I held it over my head for long periods of time. Enter the Skil 4V Max Lithium Screwdriver. This cute little tool fits in the palm of my hand so she is perfect for small jobs that don’t require any heavy thrust. She’s also super lightweight, so this is the perfect screwdriver for hanging curtain rods. I love this screwdriver! We added a new café rod and hung the new shade in just a few minutes.

Here is the final result– a super simple curtain solution for a small window. I love the crisp, clean look of the roller shade with a personalized touch! Stay tuned to see the removal of the pink and yellow flowery wallpaper. This will be my very first attempt at ever removing wallpaper, and I’m a little bit skeered. 
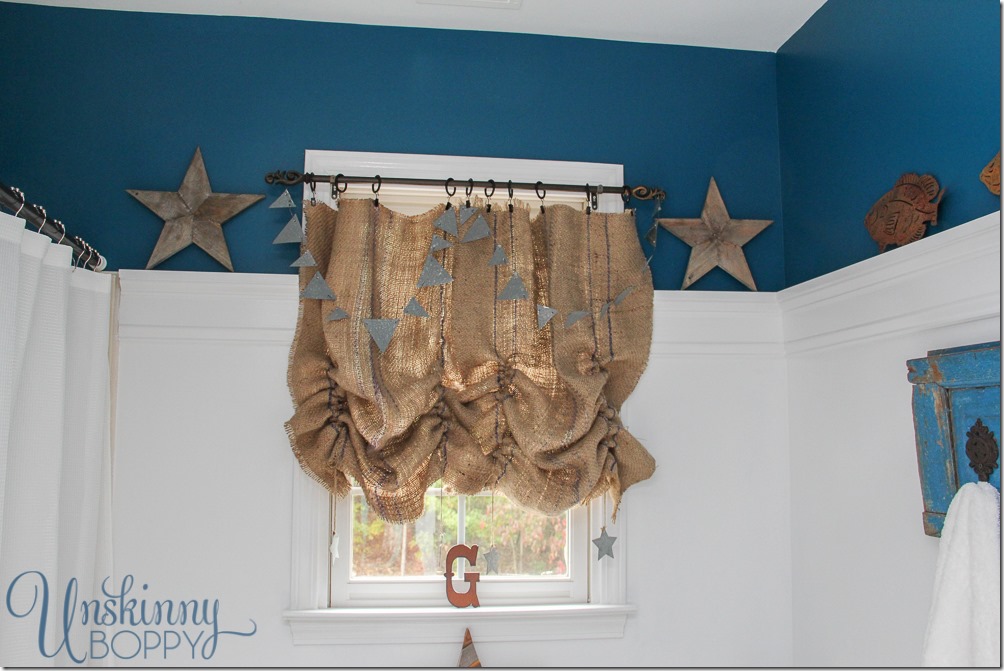
The other barren bathroom window that I’ve been holding out on decorating is in Garrett’s room. Inspiration came to me in the form of a pile of old grain sacks that I got from a local salvage place called Digs Design. I got the pile of grain sacks for FREE (wow!) but I had no clue what to do with them. I was going to give them away to another blogger, but we never coordinated our schedules well enough to hand them off. So they came home in my trunk, where I found them just in time for inspiration to hit me to create this curtain project.

I started out by just cutting the grain sacks into rectangles to fit the window and hanging them on a curtain rod with regular café clips. Well, actually, that’s not completely true. First I washed the grain sacks and let them dry in the sun to remove some of that funky grain sack smell. Then I cut them around the edges and clipped them up there. Easy peasy, right? I didn’t worry about the frayed ends since this was in a little boys bathroom. I wanted them to have a wild and wooly feel to them. This worked, but it was also kind of boring and predictable.

I’m also going to share a little secret. I added some additional blue stripes to the grain sacks with a fat blue Sharpie and a yard stick. I think it gives them a little more OOMPH to have a few more stripes. Shhhhh… don’t tell anyone I faked them.

Because my goal is to always avoid the boring and predictable in my decorating, I took a cue from my ruffled burlap lampshade and pulled on two strands on either side of the burlap panels to “ruffle” them just a bit. (Read this post for the full How To Ruffle Burlap instructions.)
I didn’t want to overdo it—just enough to give them a balloon valance look. Here is the result:

I LOVED the way they turned out, so I strung my galvanized metal bunting on top, along with a few galvanized stars on the bottom. I think this quick curtain solution turned out SO CUTE for my little man’s bathroom! Since I was able to shop my house for the materials and curtain hardware, it didn’t cost me a thing to make it. Just a few minutes of time and effort. I love projects like that!

Here is the final “After” shot with the wallpaper removed and new paint!
Ready to see the big bathroom reveal AFTER the wallpaper was removed? Check out these posts!
Rustic Boys Bathroom Makeover REVEAL. 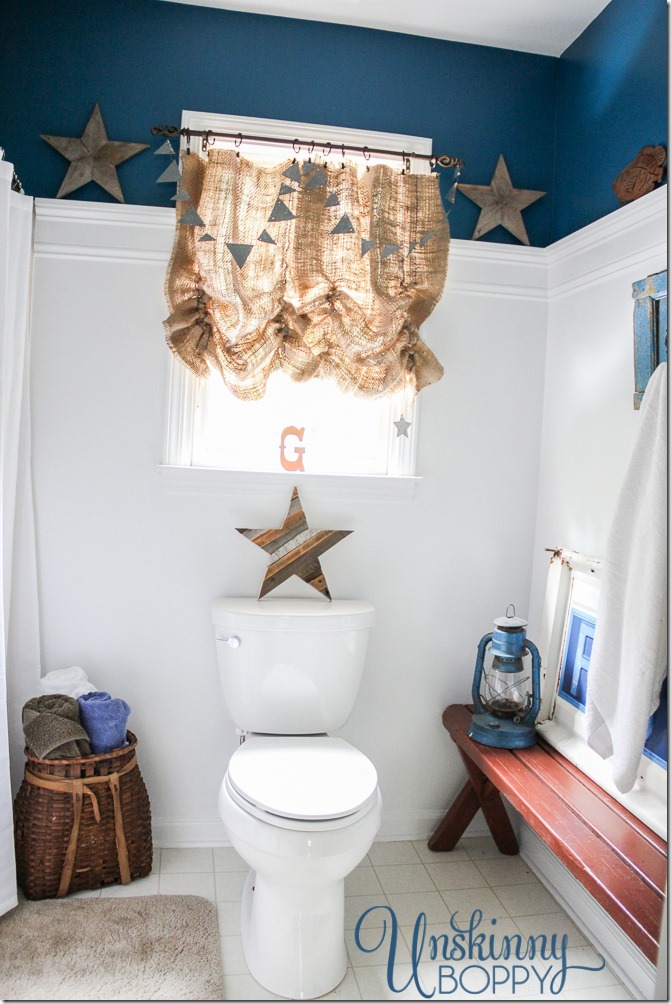
Be sure to also read How To Remove Wallpaper like a Pro to see the before and after of this bathroom in progress!
I was one of the bloggers selected by True Value to work on the DIY Squad. I have been compensated for my time commitment to the program as well as writing about my experience. I have also been compensated for the materials needed for my DIY project. However, my opinions are entirely my own and I have not been paid to publish positive comments.
Credit – Beth Bryan